Modifying ergogen layouts without learning ergogen
09.02.2026Say you found a great ergogen-generated keyboard layout that needs just a small tweak. You don’t want to learn ergogen - you just want to edit the layout and continue design with CAD tools you already know. I covered the PCB side of this a while back in a previous post. This post tackles the layout editing part.
This is a step-by-step guide. At the end of each major step you’ll find a Checkpoint box with a link to the expected kle-ng layout at that point. Use these to verify your progress or skip ahead.
Keyboard Layout Editor NG #
The Keyboard Layout Editor NG (kle-ng) is a complete rewrite of keyboard-layout-editor with extra features aimed towards the DIY mechanical keyboard community. One such feature is ergogen file imports and easy-to-use editing tools significantly improving the handling of ergo-centric properties like key rotations.
Importing ergogen layouts #
First, you must get ergogen’s config.yaml file or URL share link.
Then, navigate to kle-ng website and
select either Import->From File or Import->From URL from the top bar.
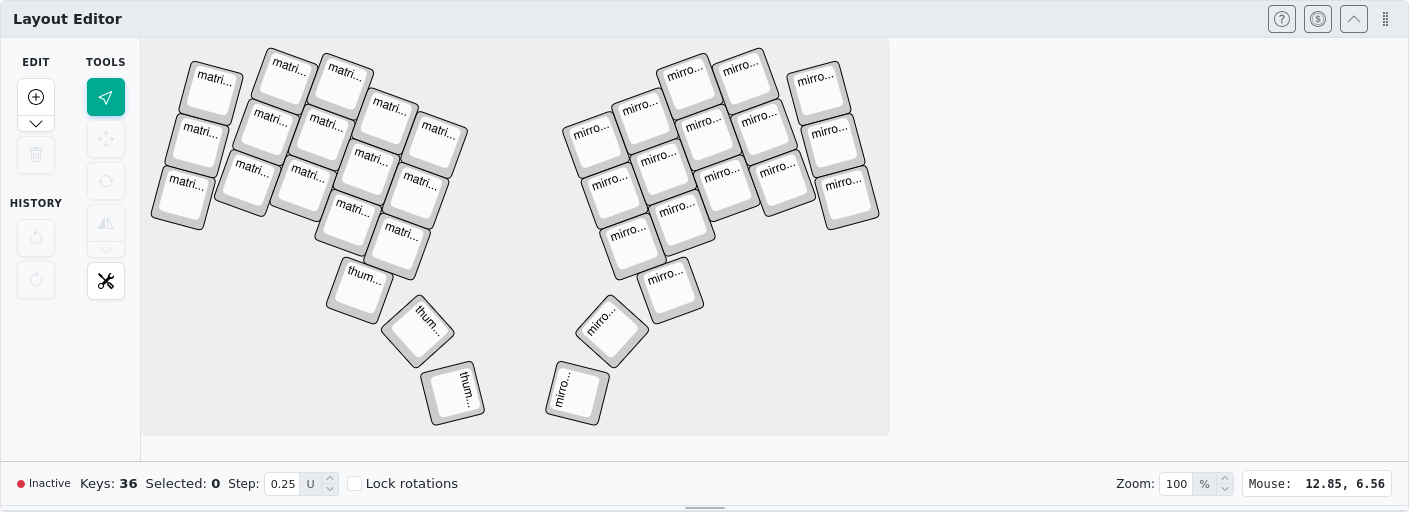
In this example, once again, I will be using the absolem layout.
Importing it with kle-ng should result in the following preview in the Layout Editor pane.
Editing layout #
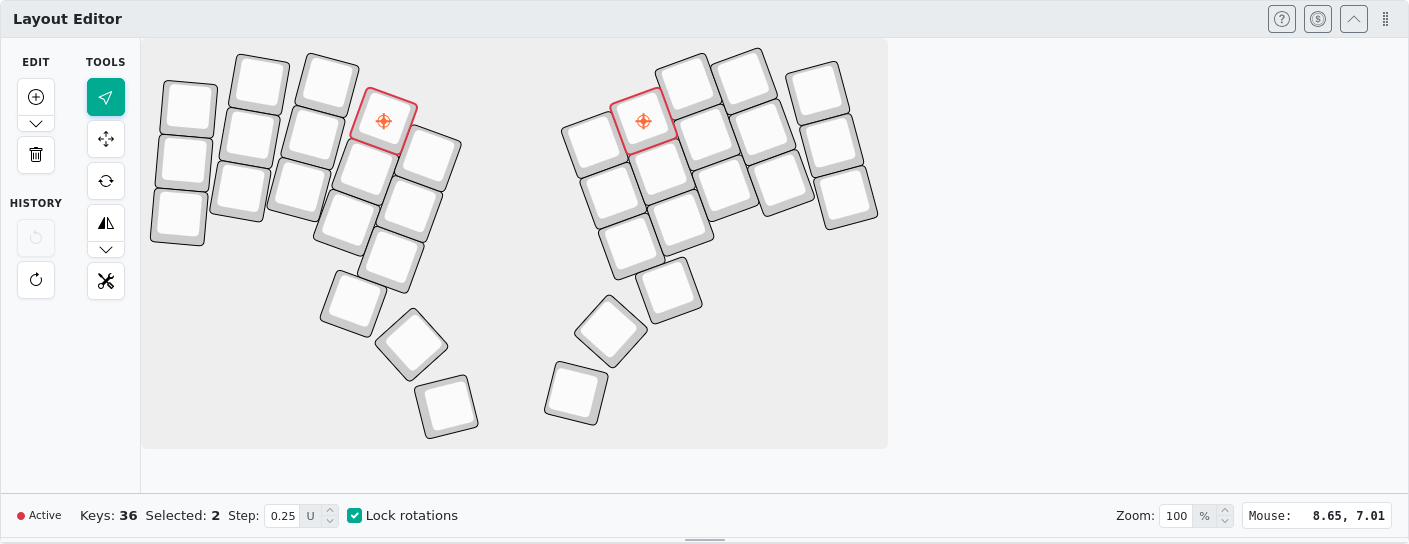
Now, using a mouse you can select a key by clicking on it. It should get highlighted and its rotation center shall be marked with a cross-hair.
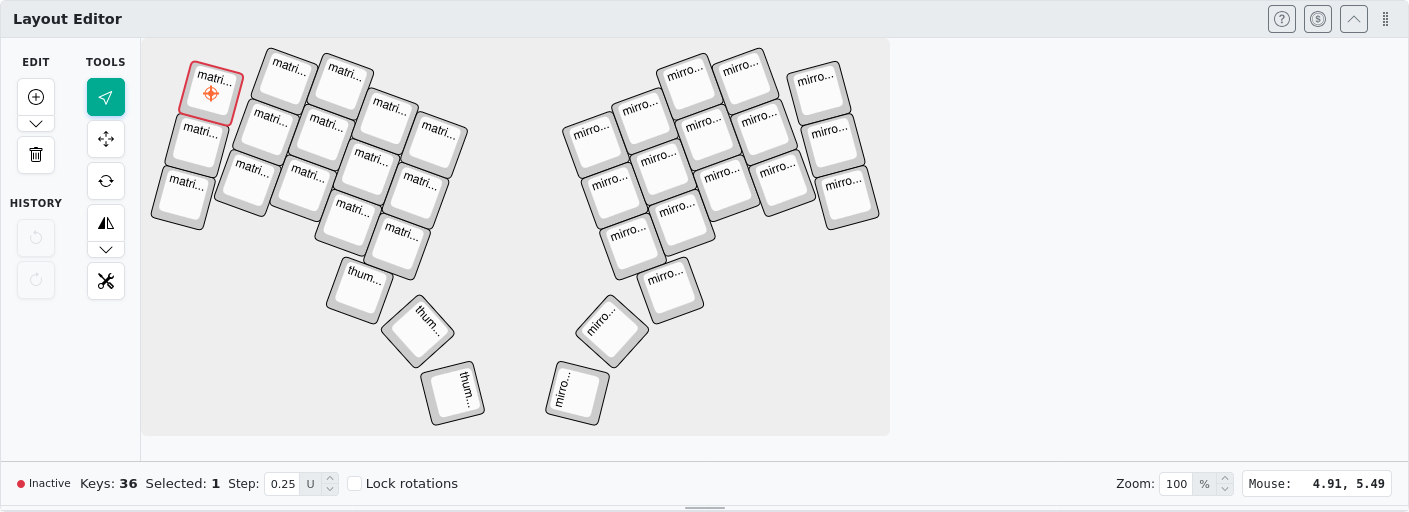
When a key is selected, the Key Properties panel becomes active. If you’ve ever used keyboard-layout-editor, this should feel familiar. The kle-ng import procedure puts the ergogen-derived key names in the top-left key label. Since we won’t be using these, we can remove them. Feel free to skip the next section if you are not bothered.

Label cleanup #
Navigate to the toolbar to the left of the layout preview window. Click on the Extra Tools icon and select Legend Tools.
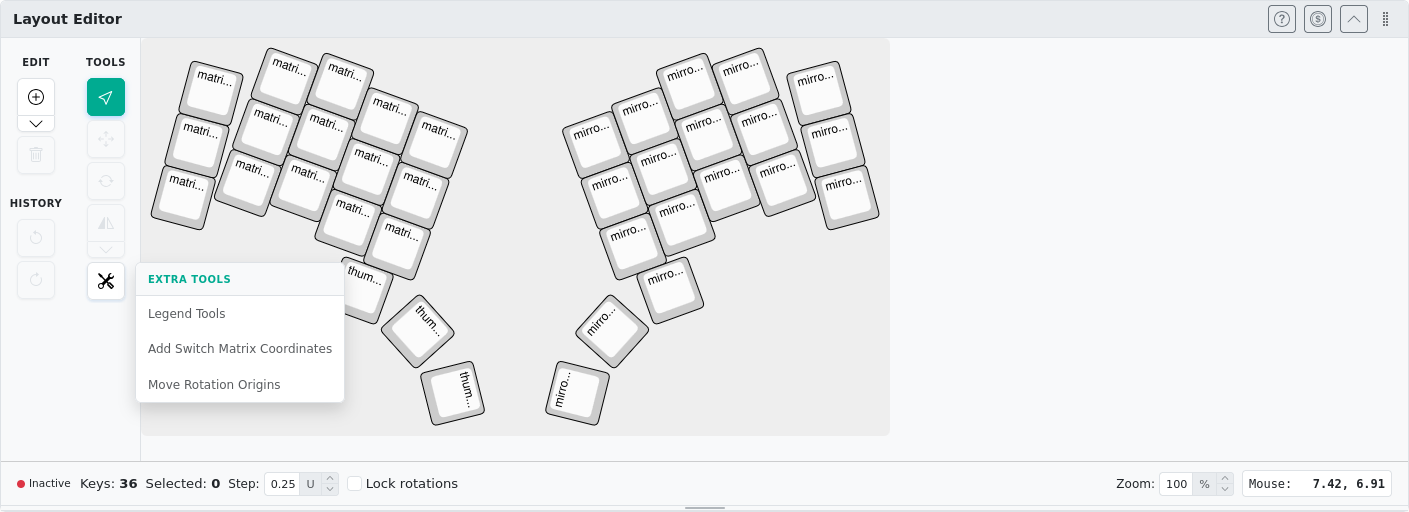
In the floating window that opens, go to the Remove tab and select All.

Alternatively, select all keys on the layout preview (either with a mouse rectangular selection or with the ctrl+a shortcut) and click the Clear all button in the Labels And Colors column in the Key Properties pane. Most properties can also be edited when multiple keys are selected.
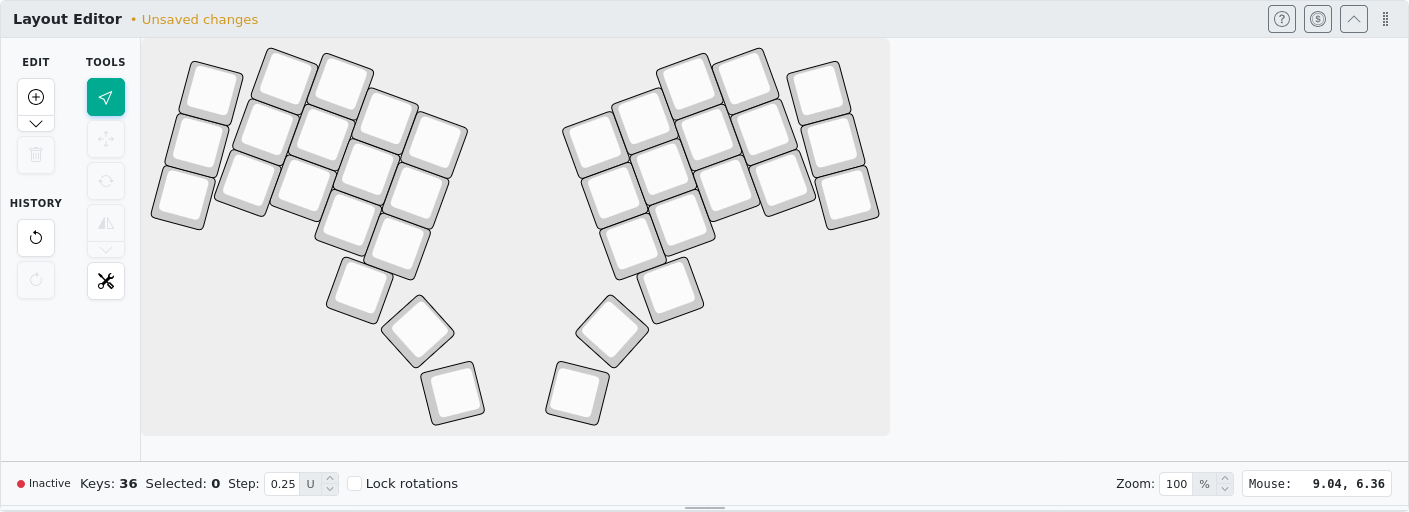
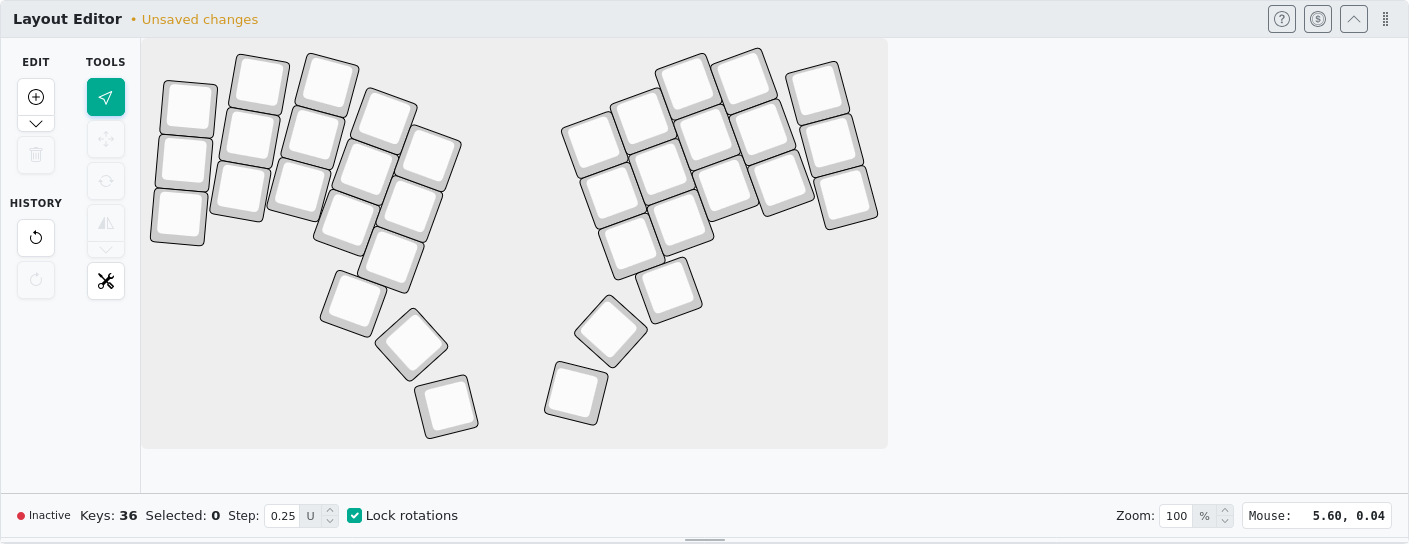
If everything went well, you should see the following result:
Moving keys #
Now we will be moving the keys around with dedicated tools from the tools toolbar (located to the left of the keyboard preview). Let’s set the following goals:
- add splay to 2nd and 3rd columns
- move 5th column and thumb cluster down by 5 mm
- maintain symmetry
Adding splay to columns #
Select all keys from the leftmost three columns:
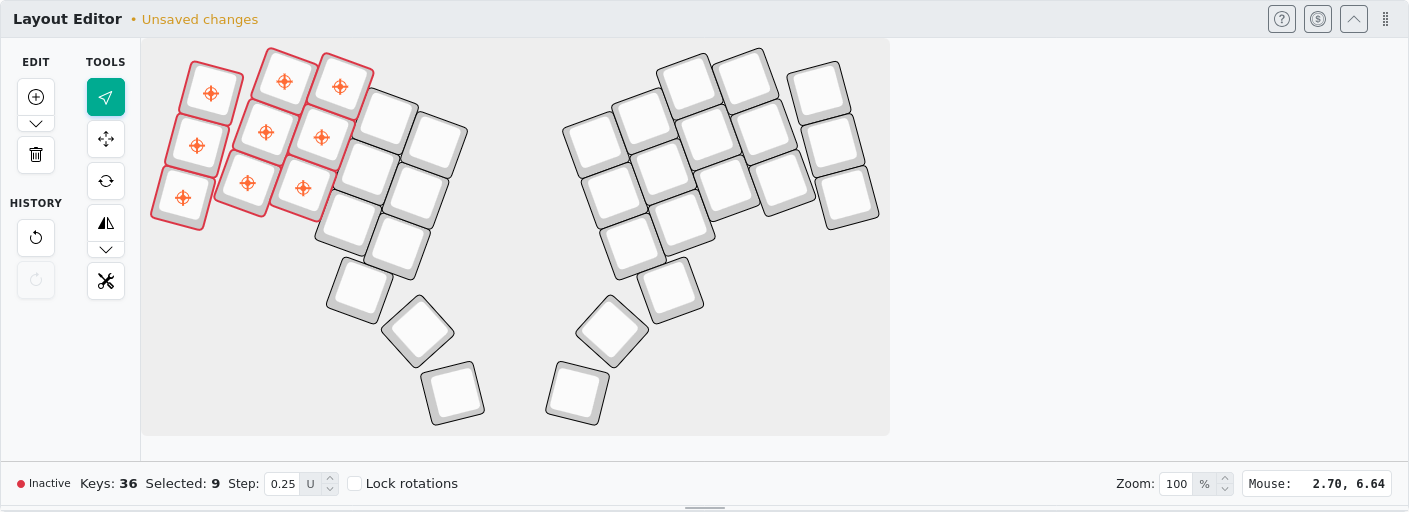
Open Rotate Selection tool:
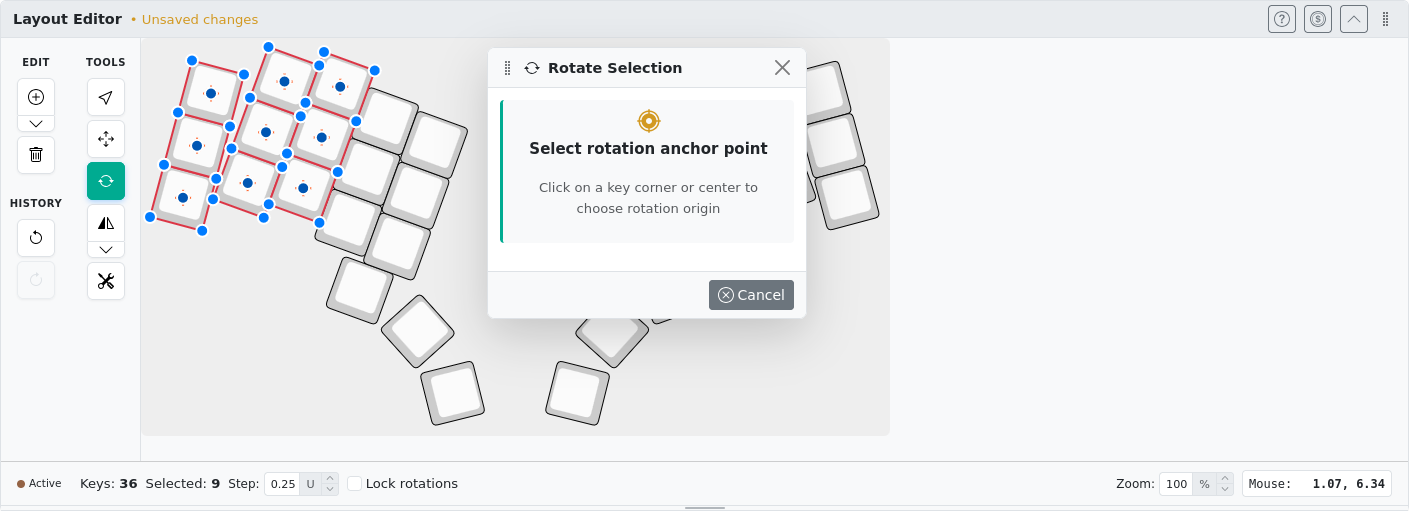
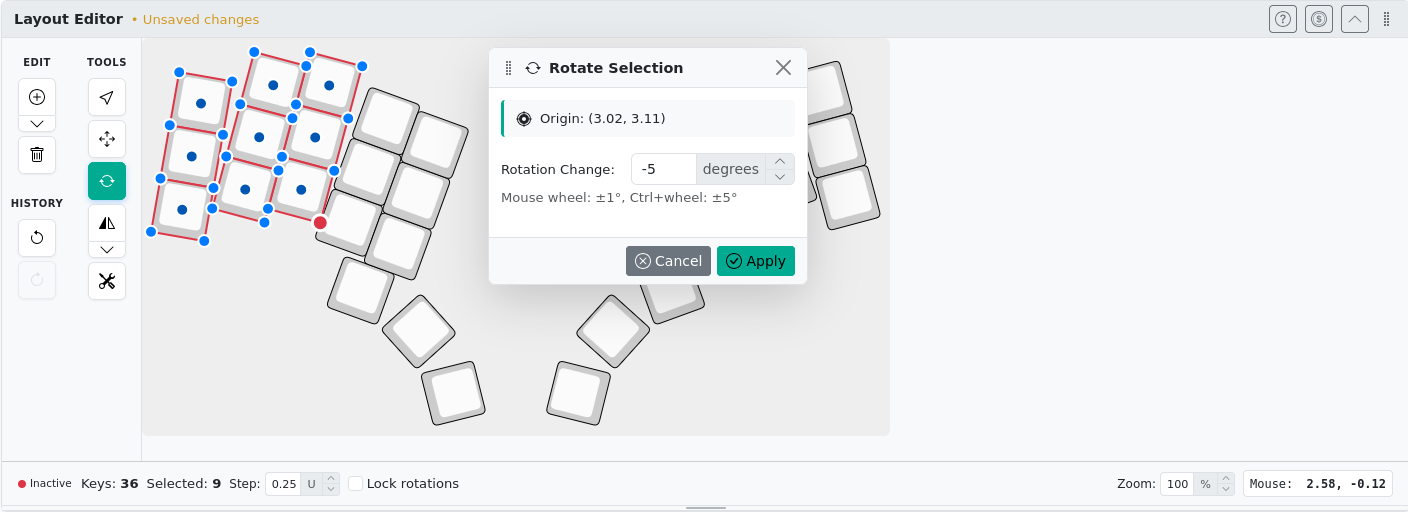
Select the bottom right corner point (red) and set Rotation Change value to -5. Confirm with the Apply button.
Repeat the rotation adjustment, but this time select only two columns. You should end up with this layout:
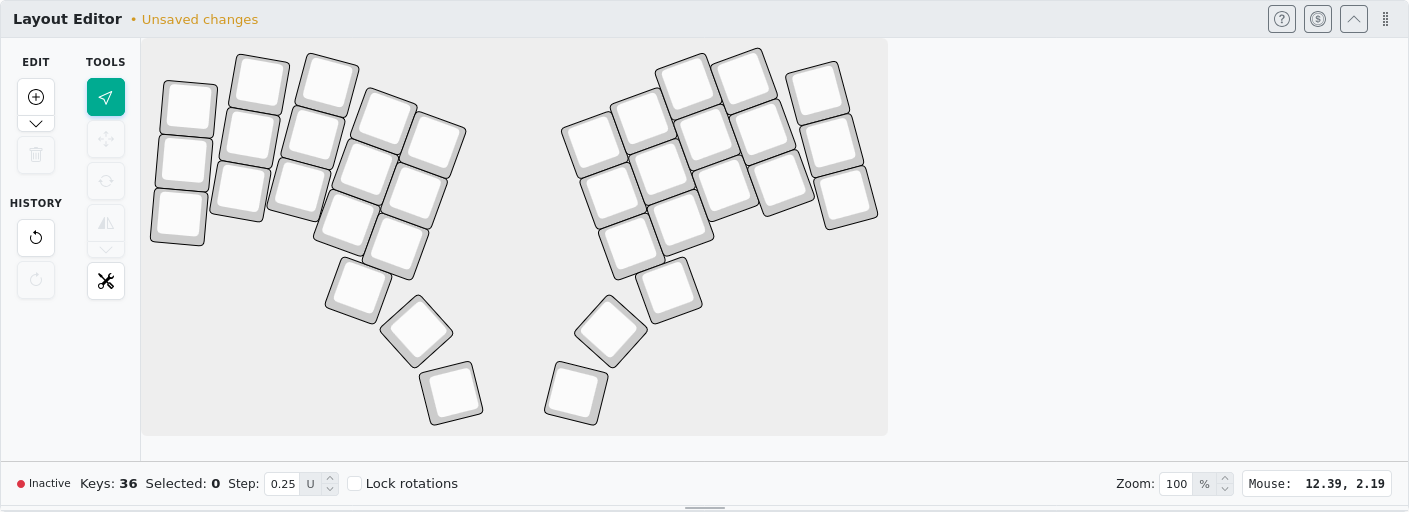
At this point our first goal has been reached.
Moving rotated keys #
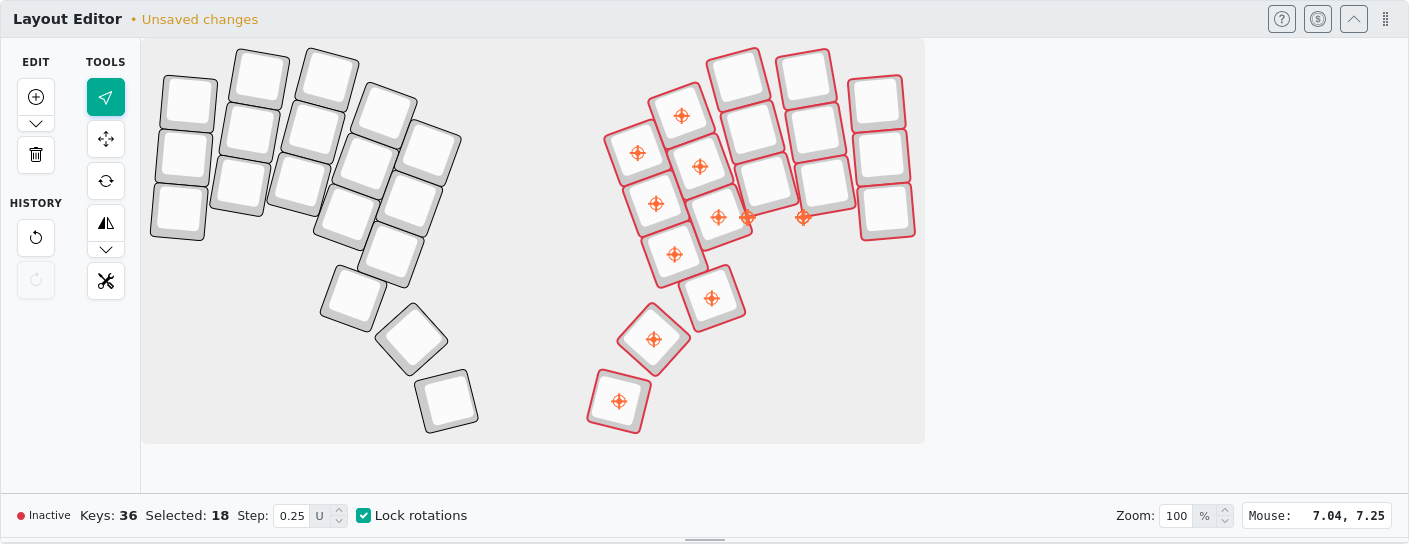
Now proceed with moving the right column and thumb cluster. Once again, start by selecting the keys to modify. Using rectangular selection may be tricky for this placement, you can use mouse clicks while holding ctrl instead.
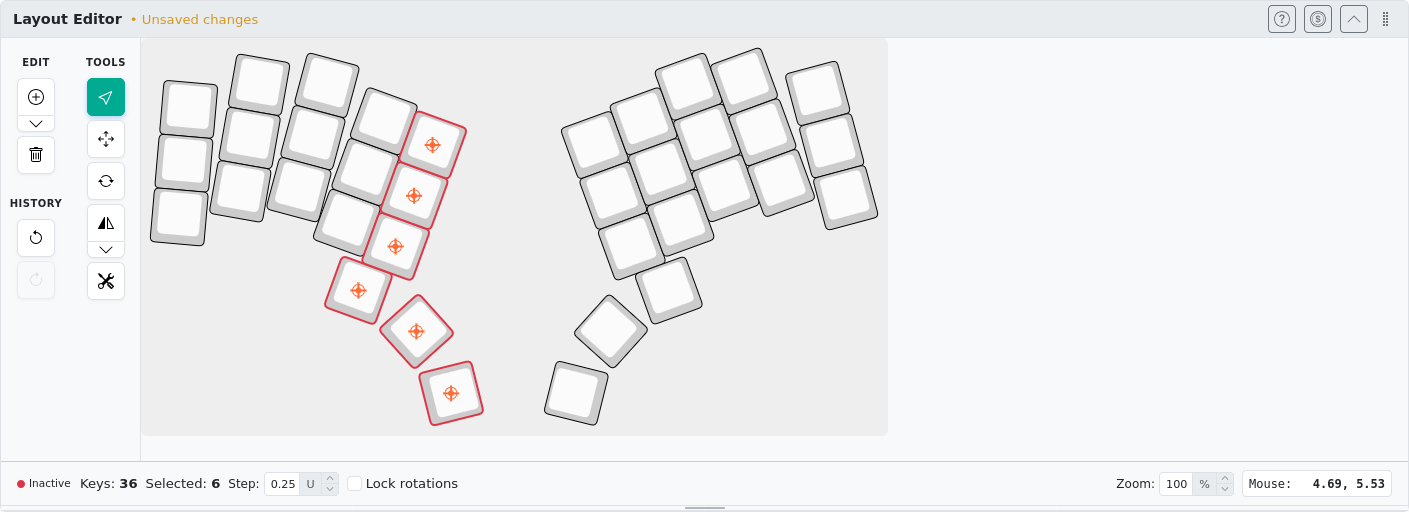
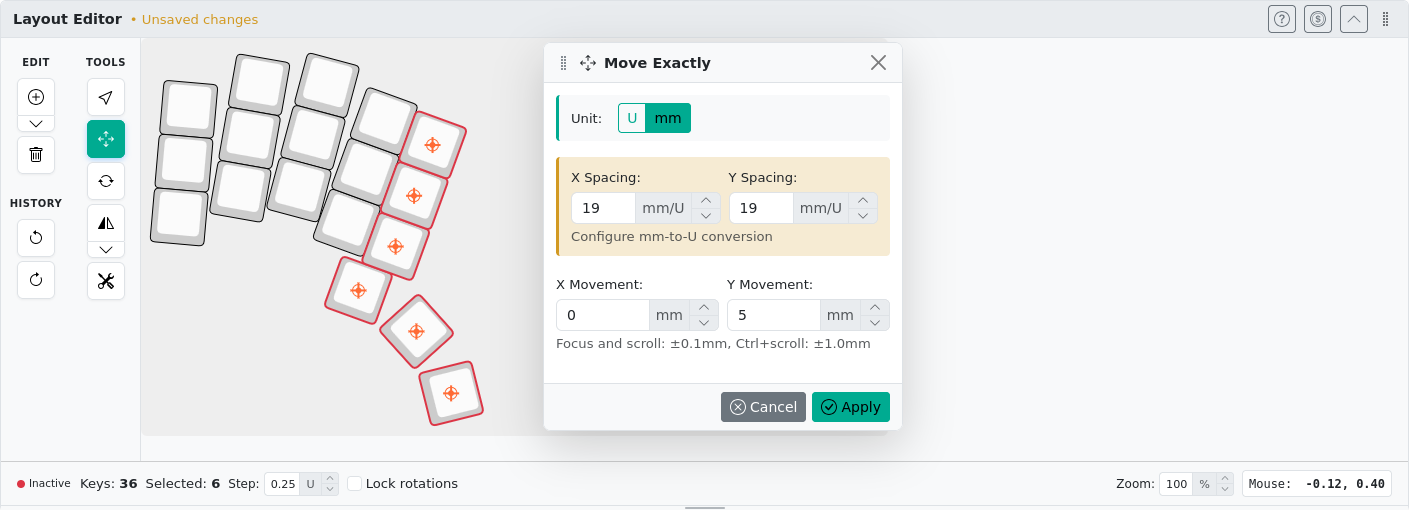
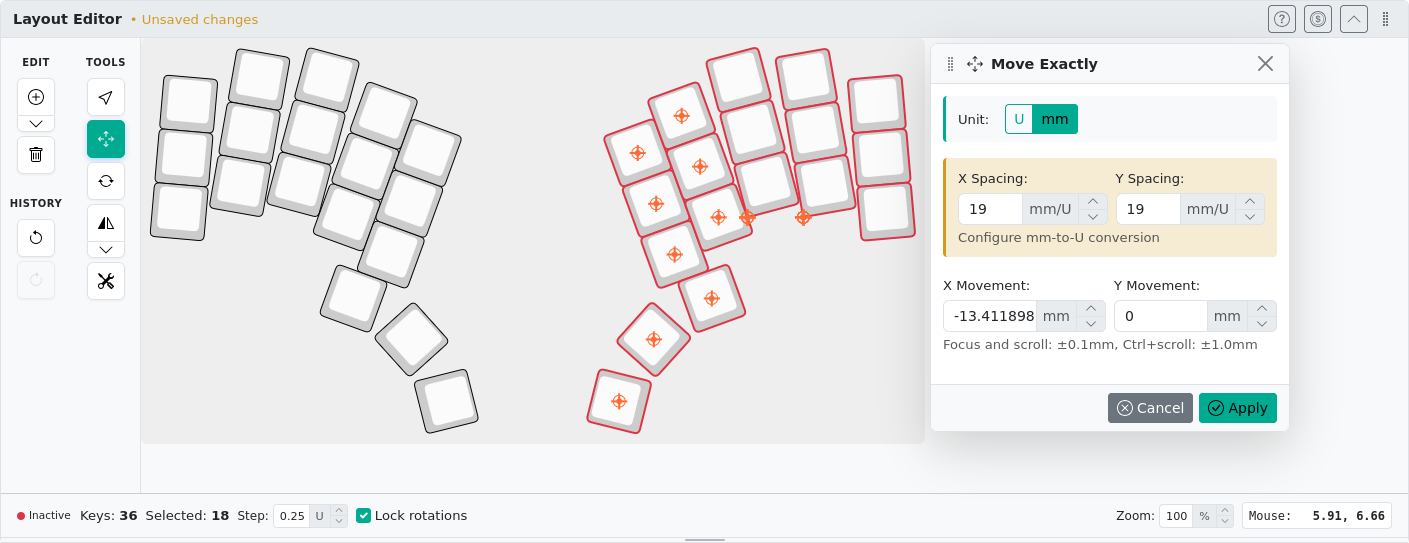
Now select the Move Exactly tool from the tools toolbar. Switch to mm units, provide spacing details (kle-ng uses normalized units internally) and set the move value to 5 mm down (Y axis). Confirm with the Apply button.
Wait a minute! The result is not what we wanted! We intentionally made a mistake to learn something. At this point the Layout Editor should show a preview like this:
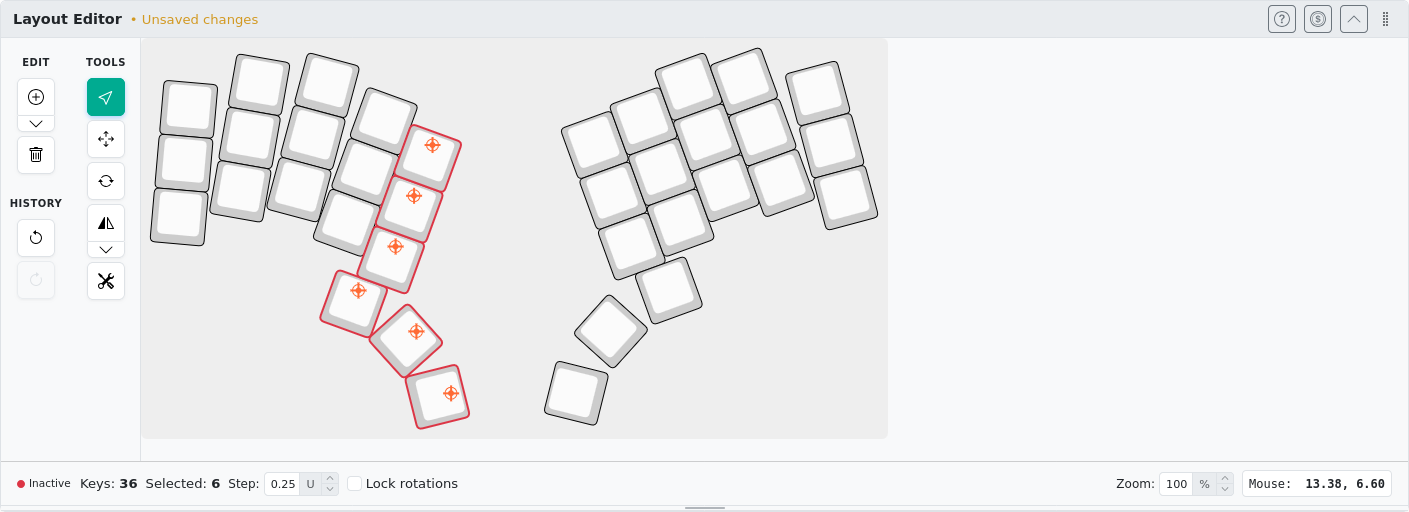
Notice that each key has moved using its own rotated coordinate system. This distorts our thumb cluster geometry. Thumb keys are now closer to each other. This is not what we had in mind. But don’t worry. We can fix it. First, use Undo from the toolbar.
First, select Lock rotations in the Layout Editor’s bottom bar:

With this option enabled, moving rotated keys no longer moves them in their rotated coordinate system. Redo the movement of the selection (same as before) to see the difference:
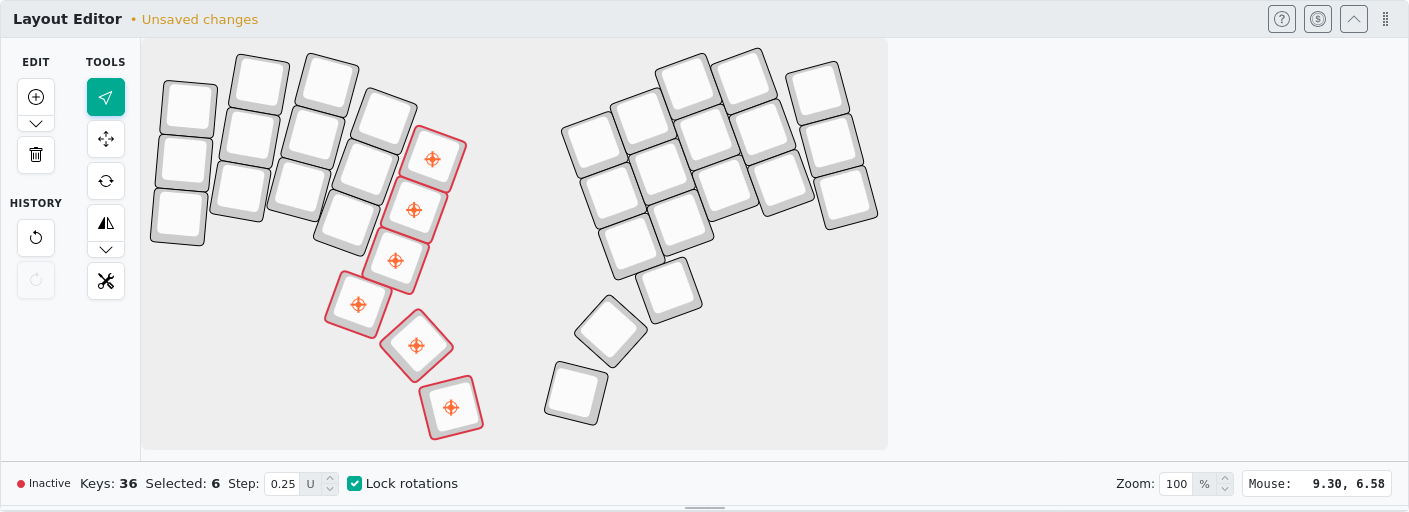
Whether or not we should lock rotations depends on the context. As you can see, the thumb cluster now preserves its shape but there is a gap between columns. That’s why we must calculate the move vector.
Run Undo one last time and calculate the proper movement values. This is our case visualized:
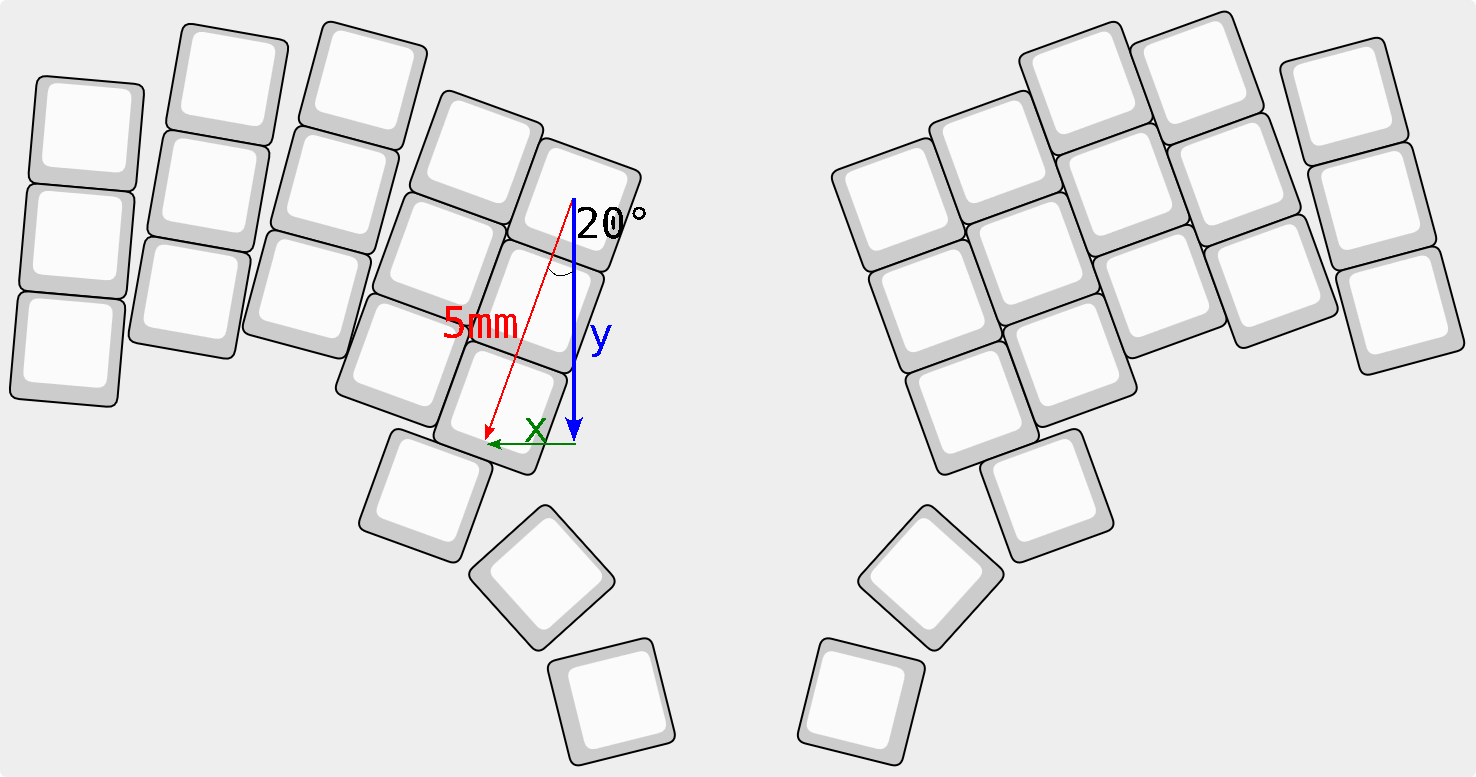
Solving for x and y using trigonometry gives us:
x = sin(20) * 5 mm = 1.7101 mm and y = cos(20) * 5 mm = 4.698463 mm.
Run Move Exactly again and enter the calculated values (remember to change the sign of x):
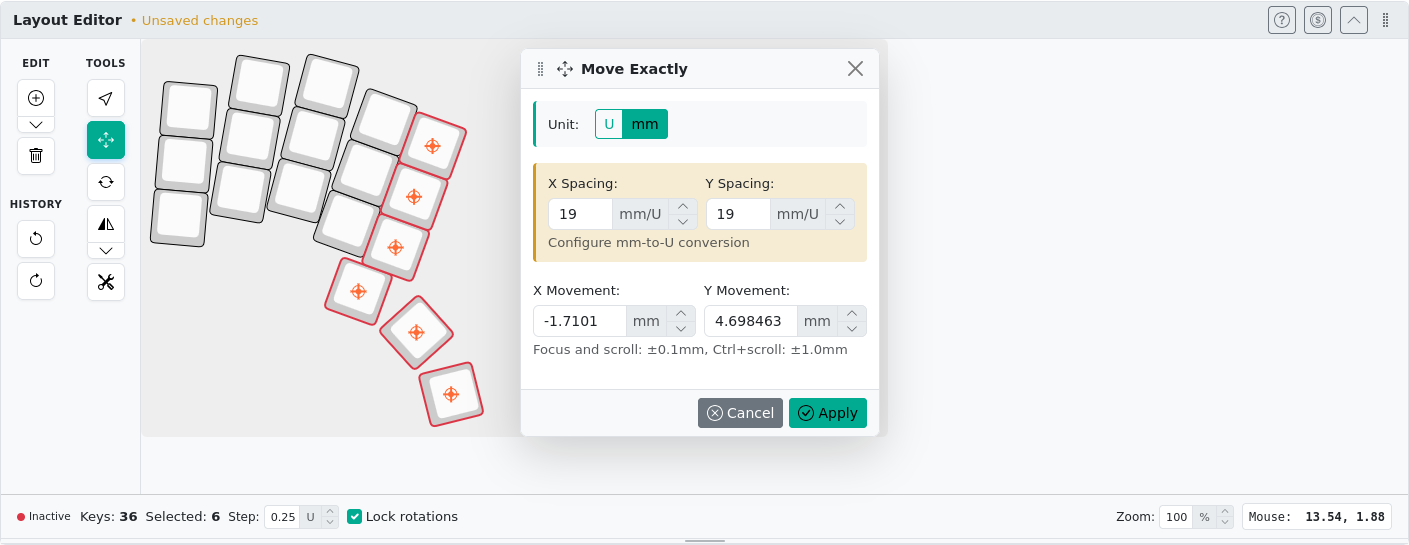
With this action, we reached our goal of moving the last column and thumb cluster:
Mirroring #
Now, to achieve symmetry we could repeat all previous steps for the second half, but that would not be very efficient. Instead, let’s use the dedicated mirror tool. But first, write down the distance between the halves (for the sake of the example let’s say that we want to keep the distance between the 4th columns, notice that we did not move them so they are the same as at the beginning). Here are these keys on the preview:
To get the distance between them, go to the Summary tab and use the Key Center Positions table (switch units to mm with the toggle):
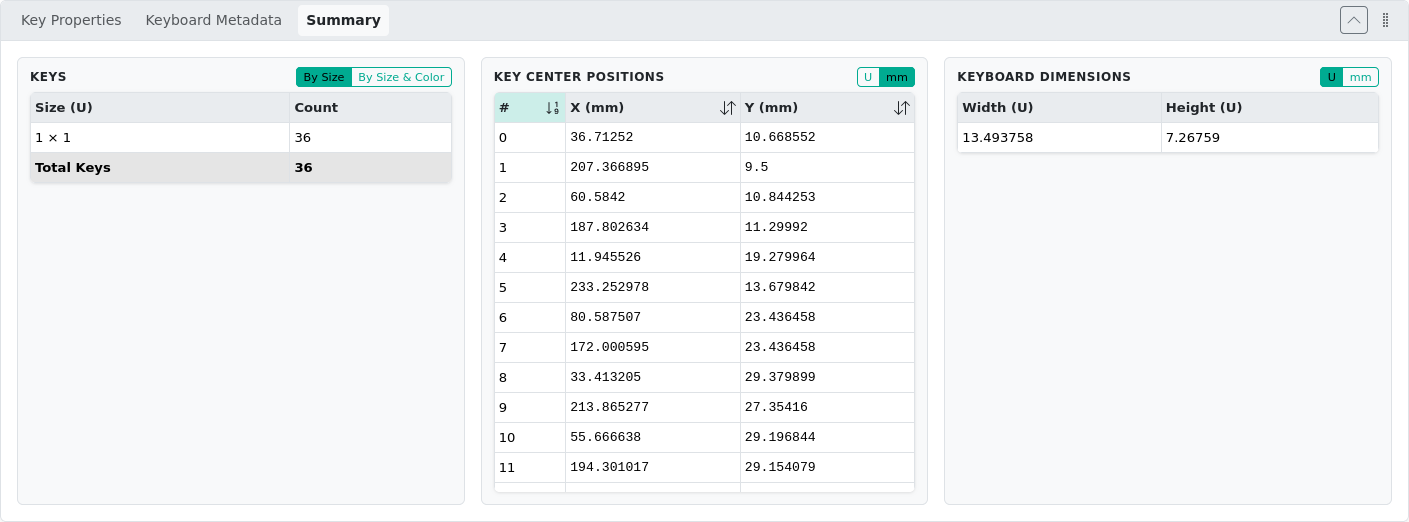
Hovering the mouse over the table rows will highlight the keys on the preview window.
Find entries 6 and 7. Subtract values of x to get the distance: d = 172.000595 mm - 80.587507 mm = 91.413089 mm.
Now we are ready to create the properly mirrored keys. First, select the right half and remove it. Then select all remaining keys and use Mirror Vertical from the toolbar:
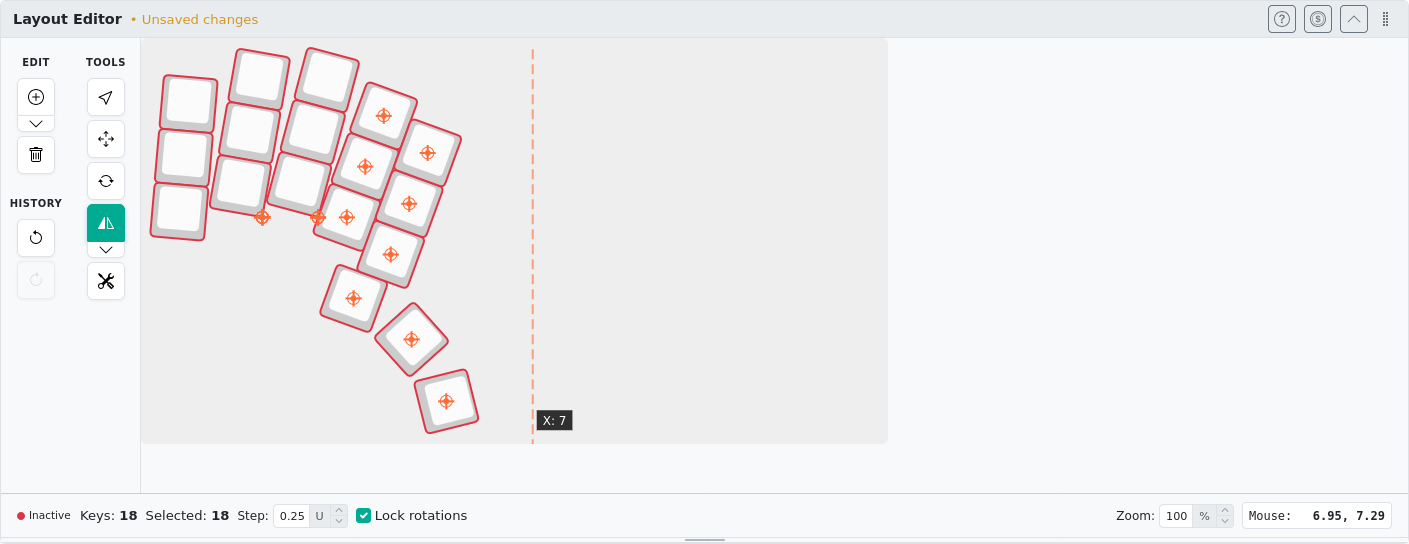
While Mirror Vertical is active, you can select the position of the symmetry axis with a mouse. The coordinate of the current position is displayed in a small popover next to it. Click on the canvas to confirm (for example at x=7).
The last thing to do is to restore the spacing we wanted (d=91.413089 mm). Go to the Key Center Positions table
once again, look for the top key of the 4th column of the right half (the key numbering will be different now!).
If you selected the mirror axis at x=7 just like me, the new position of that key will be x=185.412494 mm.
Since the left key did not move, calculate current distance: d2 = 185.412494 mm - 80.587507 mm = 104.824987 mm.
This means that our new half is too far by 104.824987 mm - 91.413089 mm = 13.411898 mm.
The fix is easy and you should already know how to do it. Use the Move Exactly tool. Since we want to move in world coordinate space, keep the Lock rotations option enabled.
And that is it. We are done. Here is side by side comparison:
| before | after |
|---|---|
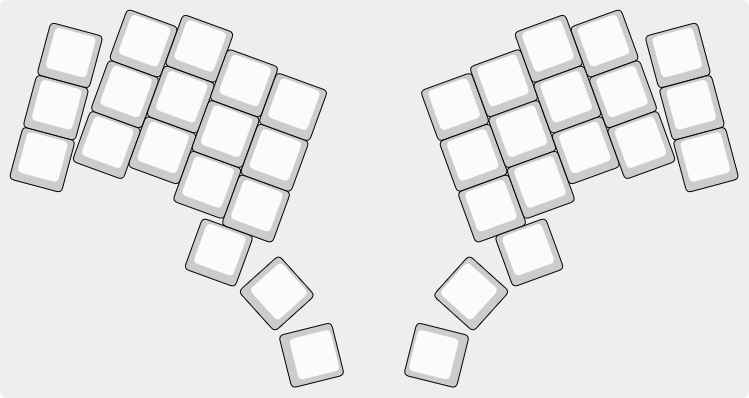 |  |
Summary #
With kle-ng you can take any ergogen layout, tweak column splay, adjust offsets, and mirror halves - all without writing a single line of ergogen configuration. The key takeaways:
- Import directly from ergogen’s
config.yamlor a share URL. - Rotate Selection handles column splay; pick the right anchor point and angle.
- Move Exactly with Lock rotations moves keys in world space - essential when working with rotated clusters.
- Mirror Vertical produces a symmetric layout. If planning to create unibody keyboard, make distance correction with Move Exactly.
In the next post we pick up where we left off and design a 3D-printable keyboard prototype in FreeCAD to test if we like our layout.